Overview and Context
This lesson was originally created for grades 6-8. It can be easily adapted down (4th and 5th grades) or up (high school) depending on the materials presented, the depth of the discussion on bias, and the amount of historical context given.
In creating this lesson the teacher wanted to combine their experience as an anti-bias educator and teacher of history. Through inquiry and journaling, in this lesson students will learn how to engage with visual primary materials as a way of deepening their understanding of historical themes. This two part lesson is intended to explore themes of cultural, social, racial and gender bias through the lens of art in a concrete way.
The first part of the lesson has students look at art with a critical eye for elements of design without receiving contextual clues about the images, the artists, or the time period beyond the name, date, and art medium. Students will be encouraged to find similarities and differences between paired pieces of art.
The second part of the lesson brings in the concept of “bias”. Students will first discuss what bias is and how it affects perspective (both for the viewer of art, and for the artist creating art). Students will then be given contextual information about the artists, their struggles, and the time period the artwork was created in. After answering journal prompts asking students to think deeply about bias in relation to art, students will then reengage with the artwork through their new lens, demonstrating how bias works while exploring the concept of bias first hand.
Related California Standards
- Writing Standards: Writing/Comprehension and Collaboration:
- Write arguments to support claims with clear reasons and relevant evidence:
- a. Introduce claim(s) and organize the reasons and evidence clearly.
- b. Support claim(s) with clear reasons and relevant evidence, using credible sources and demonstrating an understanding of the topic or text.
- c. Use words, phrases, and clauses to clarify the relationships among claim(s) and reasons.
- d. Establish and maintain a formal style.
- e. Provide a concluding statement or section that follows from the argument presented.
- Write arguments to support claims with clear reasons and relevant evidence:
- History and Social Studies Standards: 6th Grade Standards Historical Interpretation
- Students explain the central issues and problems from the past, placing people and events in a matrix of time and place.
- Students understand and distinguish cause, effect, sequence, and correlation in historical events, including the long- and short-term causal relations.
- Students explain the sources of historical continuity and how the combination of ideas and events explains the emergence of new patterns.
- Students recognize the role of chance, oversight, and error in history.
- Students recognize that interpretations of history are subject to change as new information is uncovered.
- Art Standards: 6th Grade Standards
- 6.VA:Re7.1 Identify and interpret works of art or design that reveal how people live around the world and what they value.
- 6.VA:Re7.2 Analyze ways that visual components and cultural associations suggested by images influence ideas, emotions, and actions.
- 6.VA:Re8 Interpret art by distinguishing between relevant and irrelevant contextual information and analyzing subject matter, characteristics of form and structure, and use of media to identify ideas and mood conveyed.
Learning Objectives
Students will be able to:
- Critically analyze art from a subjective manner, looking at elements of form and composition as a way of connecting artwork to bigger historical themes.
- Compare and contrast various themes and elements found within art and discuss/write about their findings both independently and within a peer group.
- Synthesize information and make connections between artistic representation of individual elements in relation to the social norms and beliefs of a particular time period or culture in relation to other groups.
Assessment
Assessment will be conducted through guided discussion, graphic organizers, and journal prompts.
Resources and Preparation
Materials
- Power Point Lesson Guide
- Visual History Image BANK–Artwork and Artist (large scale images of artwork along with artist photos)
3. Pencils, pens, or other writing utensils.
Printouts
Websites
- Projector or Smart Screen
- Personal computers (optional) for extension activities or watching videos.
- Videos:
Elements of Art and Principles of Design
Implicit Bias | Concepts Unwrapped
Preparation
Teachers will need to print out several things (1 copy of the About the Artist Page and Lesson Plan for personal use, class sets of each graphic organizer–parts 1 and 2–and enough copies of the artwork for small group use). Graphic organizers will also need to be uploaded to google classroom or other digital media for students needing accommodations. PowerPoint is OPTIONAL but can be used together with the printed pictures. If teachers want to show any of the supplemental videos or teach any of the lessons on bias, they will also need to prepare those materials by uploading them to google classroom (or other platform).
Step-by-Step Instructional Plan
PART 1: Initial Analysis
Teacher will introduce the lesson. This can be done using the slide show or through direct instruction. If using the slide show you may want to print out the images for small group work OR you can have each student independently analyze all image or any image set. Images need to be presented in matched sets for the next activity.
Discuss elements of design (show Youtube if time permits, or just go over the vocabulary). (15 mins)
The teacher will have work stations with paired images ready for students to explore. Students will be asked to analyze images following the questions on the graphic organizer. (20 mins)
Teacher will bring students back together for a guided discussion using the images and discussing a bit about the art, the artist, and the subject. The teacher will ask the students about what they noticed about the artwork. Teacher may chose to introduce the concept of bias (20 minutes)
Students will listen and ask questions about the assignment, and will either work independently or be put into small groups and begin looking at the artwork, finding similarities and differences between the works of art, analyzing them on a basic visual level. Then they will listen to historical data about the time period and the artists and answer teacher’s discussion questions either verbally or in written form–such as journaling.
Part 2: Bias and Art
This discussion will start with a whole group discussion on bias. This can be done using the slide show or as a discussion. Here are some framing questions:
- What is bias?
- When you hear the word “bias” what does it mean to you?
After listening to the students’ response, teacher may choose to follow up the definition in the slide show and watch the video if time permits. The definition used is the following definition: The Marriam-Webster Dictionary defines Bias as: “ an inclination of temperament or outlook especially : a personal and sometimes unreasoned judgment : prejudice.” It’s important to point out that biases aren’t necessarily “good” or “bad” but they affect how everyone looks at the world. They are preconceptions based on previous experiences or learned social cues. Teachers can use the “About the Artist” and “Movement Timeline” information sheets to provide a deeper understanding of the artwork, the artists, and the times they lived in.
Part 3: Journaling and Discussion
Afterwards, the teacher will give the students these journal prompt questions to be answered either in written form or verbally. This should take about 20 minutes to write and another 20 minutes to discuss.
- What relationship do you think the artist might have had with the subject?
- Do you think this is an accurate depiction of the subjects or has it been modified by the artist’s bias? In what way?
- Do you think the artist saw themselves as higher than, equal to, or socially below their subject?
- How do you think the artist’s background (bias) may have affected their artistic style?
Part 4: Making Connections
Teacher will hand out a second graphic organizer and ask students to return to their groups. As groups, they will analyze the images again, using their new knowledge as a foundation to help them look at the images critically. This will take about 15 minutes. Students will then discuss the concept of bias during group discussion and respond to the journal prompts or move on to the next graphic organizer activity. Finally, students will gather in groups to take a second look at the artwork after learning new information about the artwork and the artist.
Accommodations
ELL/Below Grade Level
- Have students watch the “Elements of Design” video before beginning art exploration.
- Pair students with more advanced students and have them work together to complete elements.
- Use element “flash cards” to allow students to make connections non-verbally between artwork and key elements.
Accelerated Learners
Challenge these students to answer the extension questions: Does the relationship between the artist and the subject change the dynamic of the artwork? How does power, privilege, and social status play a role in artistic representation?
Next Steps
The main purpose of this lesson is to teach critical thinking skills. If necessary, students may be given an additional opportunity to analyze the images in a 1 on 1 setting with a teacher or aide.
Extensions and/or Enrichment
- Lessons on Bias and Discrimination can be found from the ADL website
- Video about Implicit Bias
- Bias lesson for kids from Study.com
- Additional lessons on bias
- Elements of Art and Principles of Design video (how to analyze art)
Related Resources
Elements of Art and Design
- Massachusetts Art Institute Visual Vocabulary definitions
- Funnel, Jennifer. Elements of Art and Principles of Design video
Artists, Artwork, and History
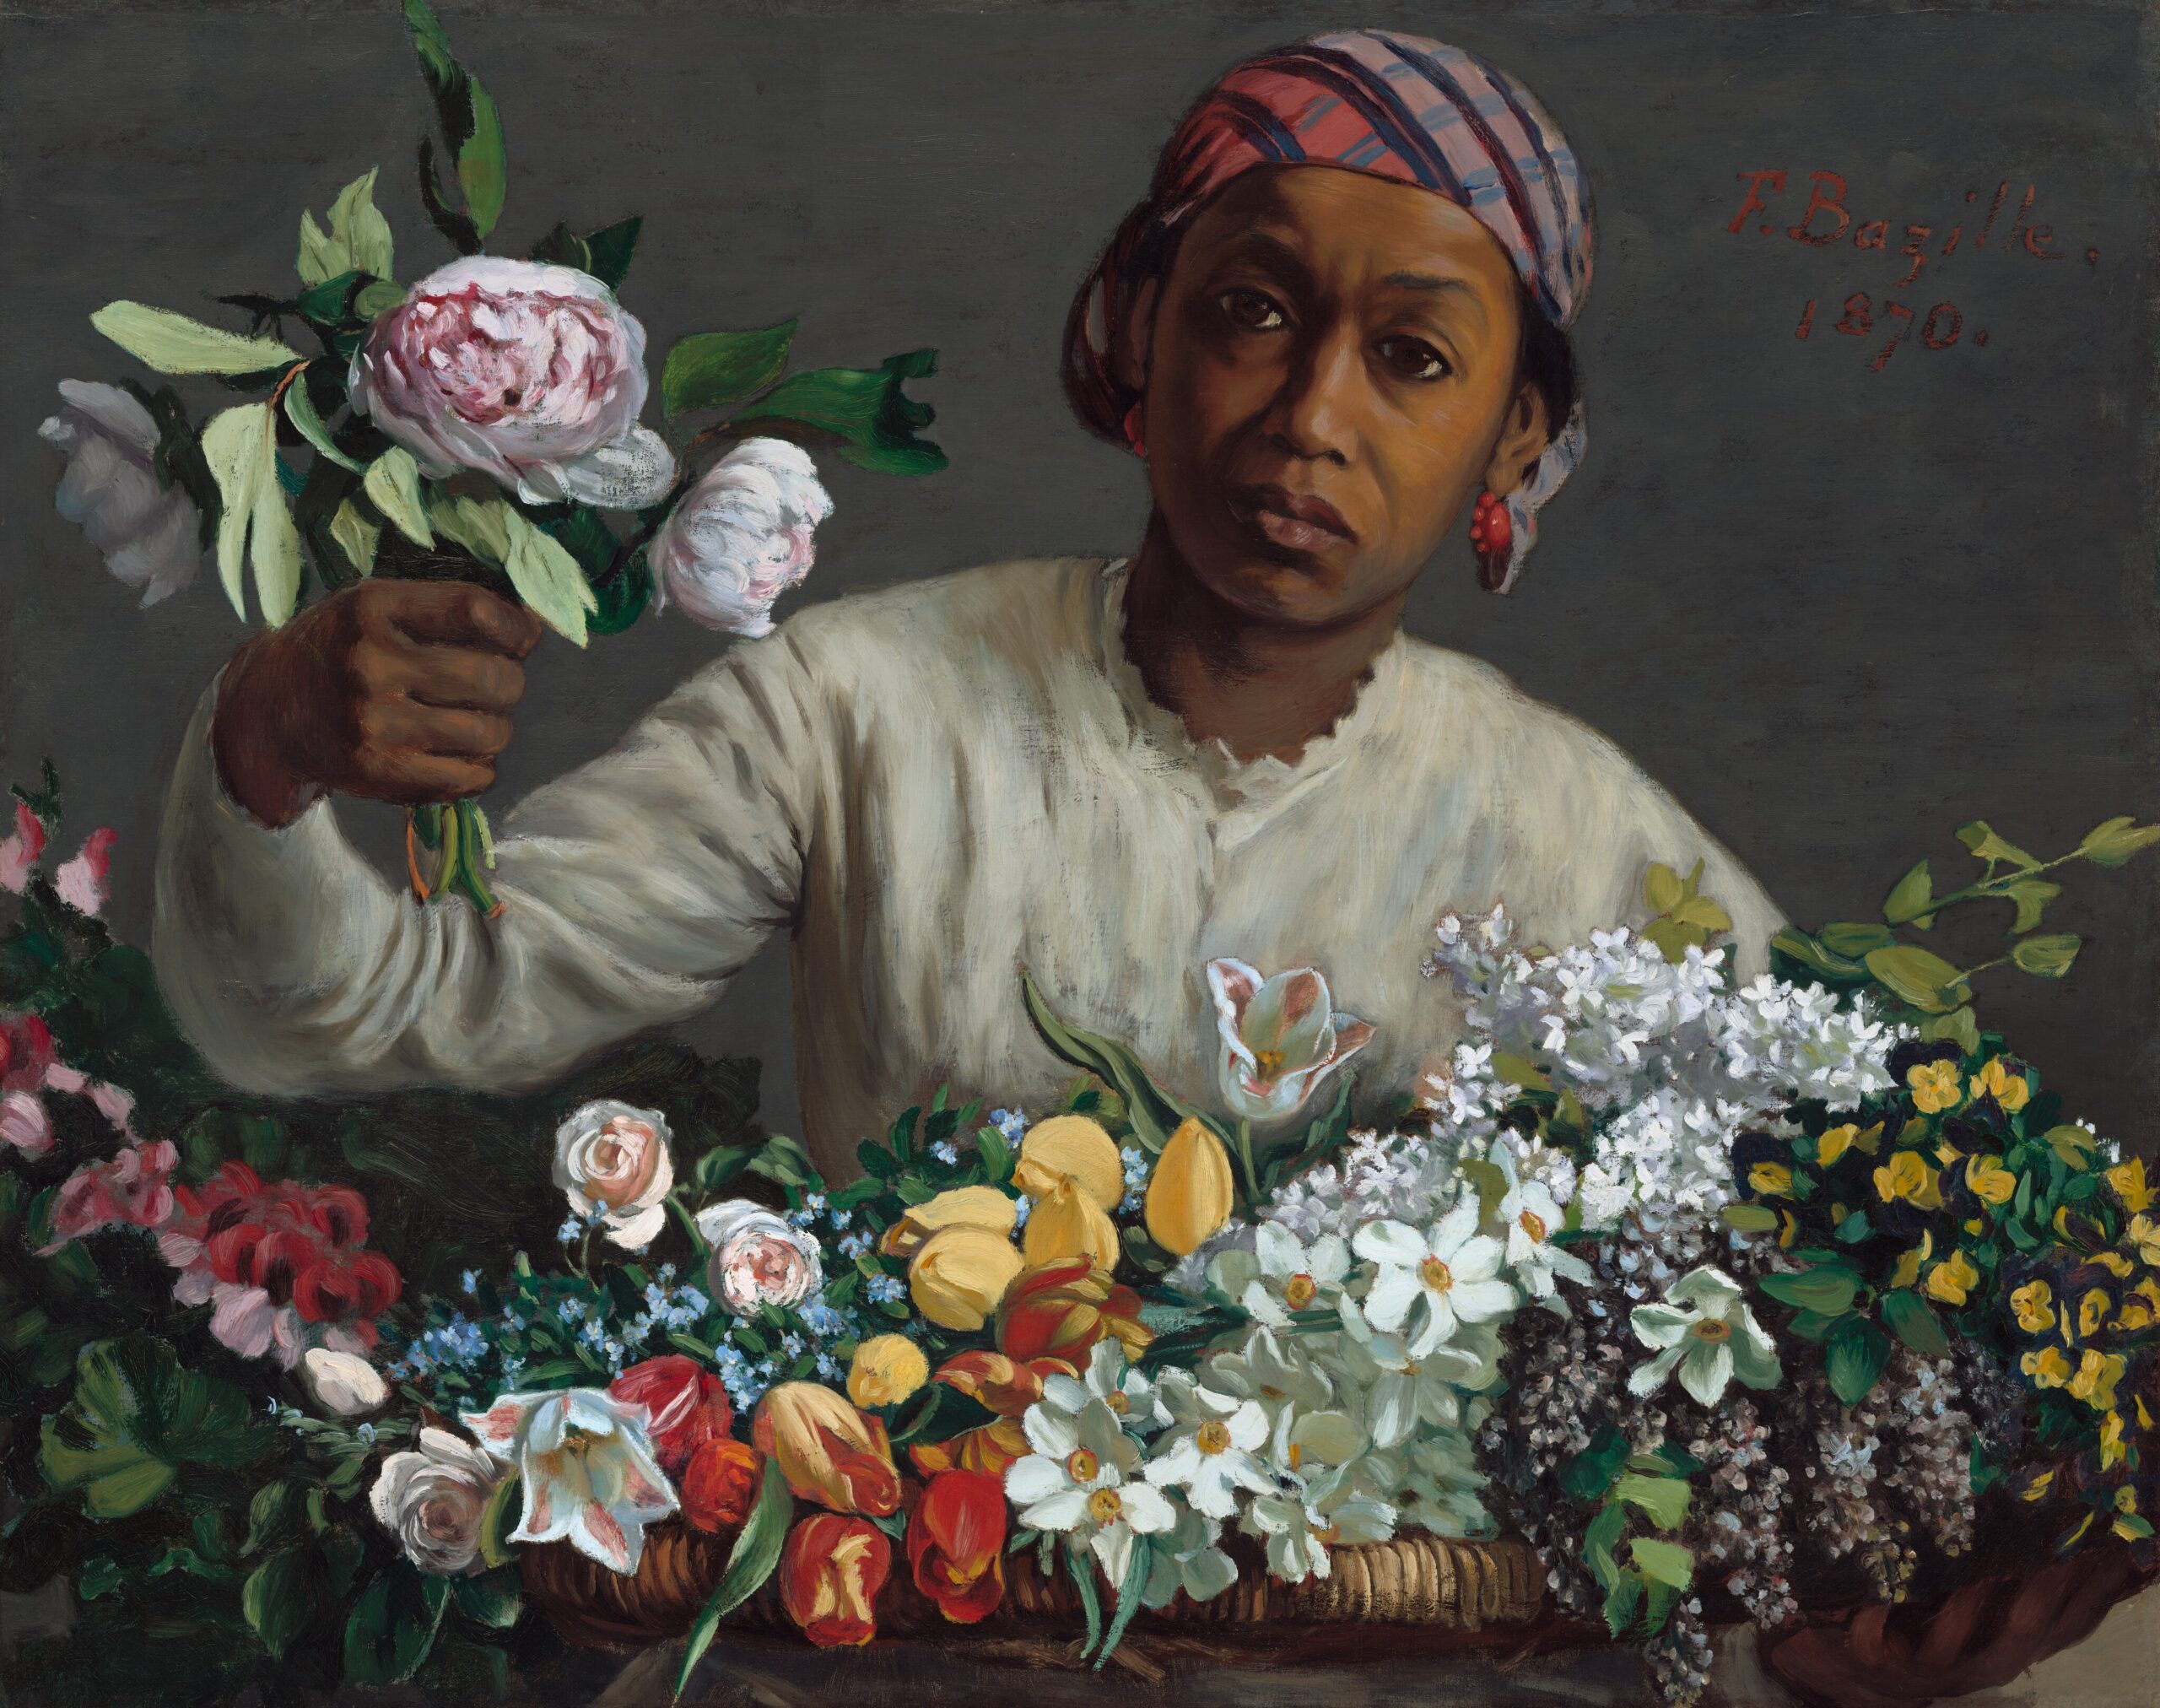
- Art Story, The “Frédéric Bazille” (biography)
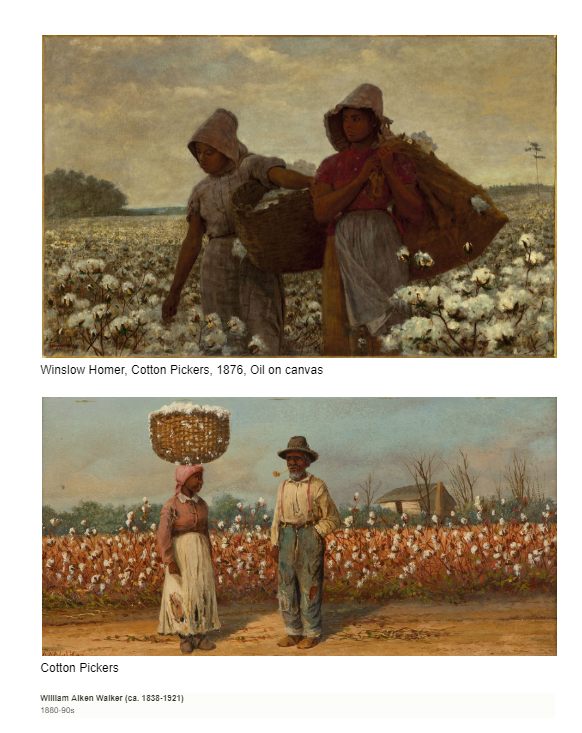
- Encyclopedia Britannica. “Homer Winslow: American Artist.”